What is every property manager’s worst nightmare? Evicted Tenants! These tenants are the absolute hardest on our rental properties. They have a hard time taking care of the places that they live in, and we have the roughest time getting them out. Once you can evict your tenants, now comes the fun part; cleaning up after them. This is very similar to and end of tenancy cleaning, except all the work falls on your shoulders. So, where do you start? That is the million-dollar question.
The first step is to go through and clean out all the garbage. Not so much fun! If it is not worth the value, you can toss it. But what about low-value items like clothing, TVs, and other electronics? We say keep them until you can figure out if the tenants will be back for them. Some states require that you reach out to the tenants and tell them where and when they can come to retrieve their belongings. When in doubt, hold onto it just in case. How long do you need to keep these items? We suggest 30 to 60 days if possible. Check with your state to know the legal time frame to keep valuable items.
Tenants can be super hard on your property. So take time to evaluate and list what needs to be repaired or replaced. You will want to place orders for items that might take time to get in (we are in a pandemic!). Make sure that the floors are free of debris to the point that you can vacuum and then move on. We have some ideas on floors later on, so stay tuned.
The Kitchen
Once you remove all the garbage, you can start to clean. We like to start with the kitchen area. The most obvious place to start is the refrigerator. Why is this the first place to start? Because it potentially has perishables that will grow mold and worsen as time goes on. Learn how to clean out a refrigerator.

After the fridge, we move to the oven and stovetop. The cleaning process includes:
Take off the knobs and any heating coils( for older models).
Scrape off the burnt-on food left on the glass tops.
Spray the stovetop with vinegar, cover with baking soda and soak for 15-20 minutes.
Wipe clean.
Cleaning the oven is different, but you will still use baking soda and vinegar.
Use a plastic scraper to remove the baked-on food and discard.
Make a paste with baking soda and some water to cover all the spots of food that you could not get off.
Leave overnight to break apart the grease and food. Do not coat the heating elements.
Scrub off the baking soda paste in the morning.
Follow up with a quick vinegar spray to foam and clean off the rest of the baking soda paste.
Now that you are through with the rigorous items, you can move to sinks, cabinets, and shelving.
The Bathroom
The first thing we do here is, spray the shower and tub with an all-purpose cleaner. If you have hard water, we suggest using vinegar or an acid-based cleaner. It will not eat away the finish on your faucets and drains. Let it soak while cleaning the sink and toilet. You can clean the vanity and sink area with an all-purpose cleaner and a scrubby sponge to get the stuck-on soap.
The toilet sometimes needs a little extra TLC. You know what I am talking about- the ring of death that never comes off. We use a cleaner meant for hard water build-up. Apply the solution and let it soak.
It will have plenty of time to soak and become ready to scrub off all the soap scum and hard water. Rinse thoroughly and wipe down with a towel. We don’t want any water spots. We just cleaned it! Finally, we return to the toilet, scrub, and flush. All done.
Floors

You may have noticed that we have not mentioned cleaning the floors during this process. That is because we like to save them for last! While cleaning the closets and shelving, there is ALWAYS dust and trash that ultimately gets brushed onto the floors.
Start with the kitchen and bathroom floors, sweep thoroughly and vacuum up the pile.
With a bucket of warm water, mop the floor to rid of any loose dirt and easy spots.
Next, we use a water and vinegar solution and a microfiber-padded mop. It is advisable for most floor types that you dilute the vinegar down.
Go to work scrubbing and removing all the tough stuck-on spots. You may have to spray individual tough spots and let them soak a bit.
It is never advisable to use excessive amounts of water or solutions. Doing that will potentially ruin your flooring.
Lastly, we hire a professional carpet cleaning company to handle this. Professional carpet cleaners do a phenomenal job of removing stains. They have vital machines and solutions that will do the job half the time and for less money. It is money well spent. Carpets show the most wear and tear from use and need the most attention during cleaning. Experience shows that using a professional company helps extend the carpet’s lifespan. Nothing turns new tenants running the other way faster than having gross, nasty, stained carpet!
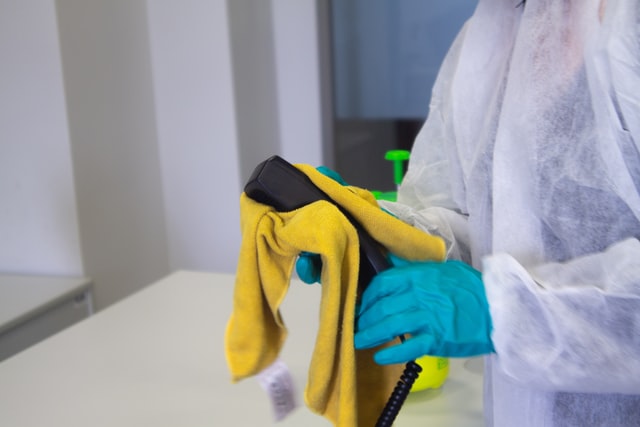
Property Managers’ Professional Note

Hire a professional cleaning company to come in and work their magic if the job is too big or you do not have the time (you are running a business).
It takes a lot of time and patience to clean any property well. That could take away valuable time working on and promoting your business. Professional cleaning companies help lower the turnaround and vacancy rates that plaque all rental properties. In most cases, the professional cleaning company can have your property cleaned and ready to go in 24-48 hours!
Tenants also appreciate having a clean home. Cleaning the rental property’s carpet every 12 months shows you care about them and your property. It can go a long way in showing your tenants that this property is well managed and help to lower your turnover rate.